
The Ultimate Kick an Uma Tsunami Guide: Master the Waves and Maximize Your Umas
Struggling to survive the waves? Our expert Kick an Uma Tsunami guide covers weight progression, rebirth strategies, and tips to reach the Celestial z
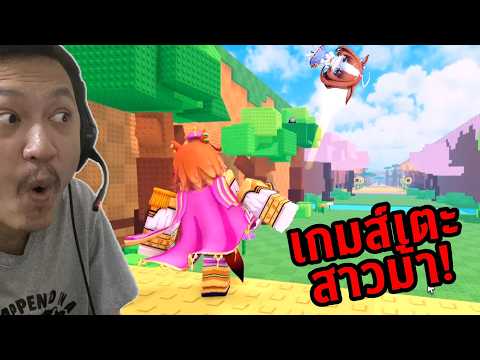 Community GameplayStruggling to survive the waves? Our expert Kick an Uma Tsunami guide covers weight progression, rebirth strategies, and tips to reach the Celestial zYouTube
 Mastering the Mechanics of Kick an Uma
If you are diving into the chaotic world of No More Flops’ hit Roblox experience, you have likely realized that mastering your timing is everything. Players often search for a proper kick an uma tsunami guide to help them balance the high-stakes escape sequences with the passive income mechanics that keep your account growing while you are offline. Whether you are stuck in the Common zone or aiming for the prestigious Celestial pedestal, this kick an uma tsunami guide will walk you through the essential steps to dominate the leaderboards and outrun every incoming wave.
The gameplay cycle is deceptively simple: you kick, you run, you collect, and you upgrade. However, the depth comes from knowing which weights to prioritize and when to trigger a rebirth. By learning how to time your kicks for maximum distance and efficiently manage your speed, you can transform from a novice kicker into an endgame powerhouse.
The Core Gameplay Loop: Kick, Run, Repeat
At its heart, the game relies on your ability to perform a "Perfect Kick" by timing the green section of the power meter. This isn't just about showing off; landing that perfect strike grants a crucial luck boost that significantly raises your chances of pulling rare, mutated Umas. Once you land your kick, the race begins.
The Survival Flow
- The Kick: Always aim for the green bar to maximize distance.
- The Escape: As the tsunami approaches, you will shift into your character’s Umas form. Use this phase to sprint back toward the safe zone.
- The Collection: Place your new Umas on an empty pedestal immediately to begin generating income.
- The Training: While your Umas work, head to the weights area to boost your permanent power level.
| Phase | Objective | Reward |
|---|---|---|
| Kick Phase | Hit the green meter | Max Power & Luck Boost |
| Tsunami Phase | Reach the safe zone | Keep the Umas |
| Base Phase | Place Umas on pad | Passive Income |
| Training Phase | Lift weights | Higher future distance |
Navigating the Rarity Zones
Understanding where your kick distance lands you is vital for progression. The game features 11 distinct rarity zones. According to community reports, players often make the mistake of lingering in lower-tier zones for too long. Instead, you should aim to push toward the Mythic or Godly zones as quickly as your weights allow.
| Zone | Stage | Strategy |
|---|---|---|
| Common | Starter | Reach with basic gear |
| Legendary | Early-Mid | Focus on power training |
| Mythic | Mid | Upgrade speed or lose the loot |
| Hacked | Endgame | High mutation chance area |
| Celestial | Endgame | The ultimate goal |
Weight Progression: What to Buy (and What to Skip)
Your Kick Power is the primary driver of your success. However, not every barbell is worth your hard-earned coins. If you spend your budget on incremental, small upgrades, you will find yourself slowing down just as the game gets difficult.
Based on official Roblox community statistics, experienced players recommend skipping the Stone Block entirely and saving your funds for the Copper Plate. This specific transition provides the most efficient "power-per-dollar" ratio in the early game.
Recommended Weight Tier List
| Weight Item | Power per Lift | Efficiency Rating |
|---|---|---|
| Bone Barbell | 5 | Must-have early game |
| Copper Plate | 50 | High priority |
| Ice Barbell | 450 | Essential for Mythic |
| Donut Barbell | 1,000 | Great for post-rebirth |
| Giant Gold Star | 99,999 | Endgame goal |
Pro-tip: Never spread your budget too thin. If you are close to unlocking a major tier, keep grinding rather than buying minor items that don't shift your kick distance meaningfully.
Tsunami Survival: Why Speed is Your Best Investment
Many beginners overlook the Run Upgrade Shop, thinking that pure power is the only way to win. However, if you cannot survive the tsunami, you cannot secure the Umas that fund your empire. As you move into the Mythic zone and beyond, the waves move significantly faster.
Unlike your power level, which resets upon rebirth, your speed upgrades are permanent. This makes them the safest possible investment for your coins. We recommend allocating a portion of your income to speed after every major power upgrade to ensure you never lose a high-tier Umas to a missed escape.
Rebirth Strategy: When to Reset
Rebirthing is a double-edged sword. It grants a permanent multiplier to all Umas income, but it wipes your kick distance, essentially starting you over. If you rebirth too early, you may find that the grind back to your previous zone takes far longer than the income boost justifies.
Rebirth Checklist for Success
- Hit the Threshold: Ensure you have reached at least 1,000 Kick Power.
- Verify Your Gear: Do you have enough coins to buy back your previous tier of barbells immediately?
- Base Income: Are your current Umas pedestals filled with high-value items?
- Consider the Cost: If you are struggling, remember that the developer offers a Robux shortcut to keep your power level intact if you want to speed up the process.
Essential Tips from Top-Tier Players
To truly master the mechanics, consider these insights gleaned from community reports and veteran gameplay:
- Mutation Hunting: Once you enter the Legendary and Mythic zones, stop settling for base-level Umas. Only "mutate" pulls offer the 8x income multipliers you need to reach the endgame.
- Declutter Your Base: Don't be afraid to sell low-value Umas as you progress. Your pedestal slots are limited, and filling them with low-yield assets is a waste of potential revenue.
- Offline Income: Always check the display at your base to see your daily earnings. You can essentially let the game run in the background to build up the capital needed for those expensive endgame barbells.
- Perfecting the Kick: Practice your rhythm on the kick meter. The "luck boost" provided by a Perfect Kick is the hidden mechanic that helps players secure the rare mutations required for the Celestial zone.
Frequently Asked Questions (FAQ)
Does this kick an uma tsunami guide work for all game versions? Yes, these strategies are based on the core mechanics of the current build. While the developers may adjust values, the fundamental loop of training power and investing in speed remains constant.
Should I spend Robux on the rebirth skip? It is a quality-of-life purchase. If you play frequently and find the power reset tedious, it is one of the most effective ways to save time, but it is entirely optional for skilled players.
What is the fastest way to get to the Celestial zone? The fastest path involves ignoring incremental weight upgrades and focusing entirely on high-tier barbells while maintaining enough speed to survive high-difficulty tsunamis.
How do I know if I have a mutated Umas? Mutated Umas will be visually distinct and provide a significantly higher passive income multiplier—sometimes up to 8x the base value. Keep an eye on your pedestal income stats.
Related Guides
Complete Guide to Kick an Uma Controls: Master Your Racing Strategy in Roblox
Master your gameplay with our comprehensive guide to kick an uma controls. Learn key inputs, racing mechanics, and pro tips to dominate the track toda
Kick an Uma How to Play: Mastering the Viral Roblox Experience Guide
Learn how to play the viral Roblox sensation Kick an Uma. Discover expert tips, gameplay mechanics, and community strategies to dominate the experienc
Mastering the Kick an Uma Perfect Kick: The Ultimate Guide to Launching Your Way to the Top
Learn how to land a Kick an Uma perfect kick to maximize your distance, collect top-tier units, and dominate the leaderboards in this Roblox tycoon hi
Mastering the Mechanics: How to Kick an Uma and How to Kick Farther for Maximum Distance
Learn the secrets behind professional-grade kicking distance. Discover how to kick an uma, improve your swing, and boost your power with expert traini